Have you noticed your social media feed suddenly flooded with impossibly cute, rustic ornaments that look like they came from a fancy craft fair? They’re not store-bought. They’re salt dough ornaments, and the internet is obsessed with them right now.
This decades-old craft technique is having a massive comeback, especially among parents, teachers, and DIY enthusiasts looking for a budget-friendly, non-toxic, and kid-safe holiday activity. The best part? You only need three pantry staples, and the results look expensive.
Let’s break down why this recipe is going viral, how to make perfect salt dough every time, and six adorable design ideas you can start tonight—even if you’ve never crafted anything in your life.
Why salt dough ornaments are trending right now
Unlike store-bought decorations that cost a fortune and lack personality, salt dough ornaments are completely customizable. You control the shape, the color, and the sentiment. Plus, they’re surprisingly durable when sealed properly, meaning your creations can last for years.
Parents are especially drawn to this craft because it’s safe for toddlers (no toxic fumes or choking hazards) and doubles as a screen-free bonding activity. Teachers love it because the materials cost less than five dollars for an entire classroom project.
And aesthetically? Salt dough has that handmade, farmhouse charm that fits perfectly with the “cozy minimalism” trend dominating Pinterest and Instagram right now.

The foolproof salt dough recipe
Here’s the classic three-ingredient formula that’s been passed down for generations:
- 2 cups all-purpose flour
- 1 cup salt (table salt works fine)
- 1 cup cold water (add gradually)
Instructions:
Mix the flour and salt in a large bowl. Slowly add water, stirring until a dough forms. Knead for 5-7 minutes until smooth and pliable—not sticky, not crumbly. If it’s too dry, add water one teaspoon at a time. Too wet? Add a bit more flour.
Pro tip: Roll your dough to about ¼-inch thickness for ornaments. Thinner pieces bake faster but are more fragile. Thicker pieces take longer but hold detail beautifully.
How to bake and preserve your ornaments
Preheat your oven to 200°F (93°C)—low and slow is key. Place ornaments on a parchment-lined baking sheet and bake for 2-3 hours, flipping halfway through. They’re done when completely hard and no longer doughy in the center.
Air-drying alternative: If you have time, let them dry at room temperature for 2-3 days, flipping daily. This method prevents cracking but requires patience.
Once cool, seal them with clear acrylic spray or mod podge to protect against humidity. This step is non-negotiable if you want them to last beyond one season.

6 cute design ideas to try tonight
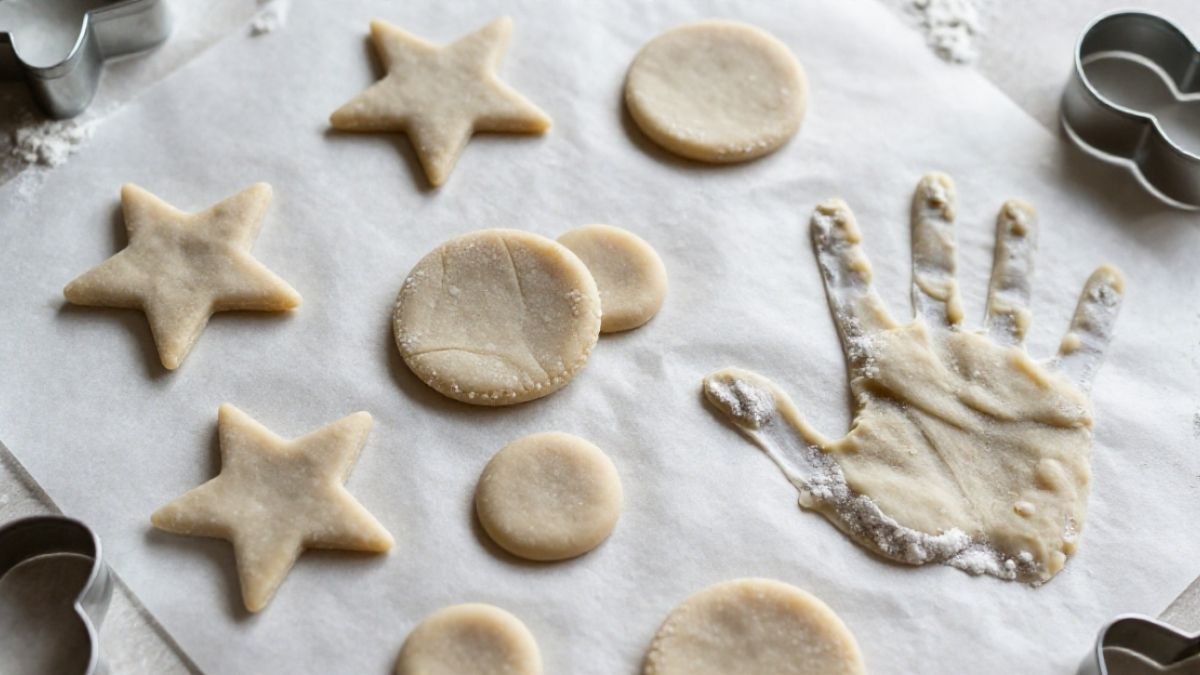
1. Classic hand or footprint ornaments: Press your child’s hand into the dough before cutting. Date the back with a toothpick. This becomes a keepsake that captures their size at this exact age.
2. Cookie cutter shapes with stamped details: Use holiday cutters (stars, trees, gingerbread people), then stamp patterns with lace, burlap, or rubber stamps before baking.
3. Personalized name tags: Roll out the dough, cut into rectangles, and use letter stamps or a toothpick to write names. Perfect for gift tags or place settings.
4. Nature-inspired imprints: Press pine needles, leaves, or twigs into the dough for organic texture. Paint with earthy tones after baking.
5. Minimalist geometric shapes: Cut hexagons, circles, or triangles. Leave unpainted for a Scandinavian look, or paint in monochrome.
6. Pet paw prints: Gently press your dog or cat’s paw into the dough (bribe with treats). This one tugs at heartstrings every single year.
Make it yours
The beauty of salt dough is its versatility. You’re not locked into a single style or color scheme. Paint them with acrylics, leave them natural, add glitter (if you’re brave), or write meaningful quotes with a fine-tip marker.
These aren’t just ornaments—they’re memory capsules. The wobbly handwriting. The off-center paw print. The year your toddler insisted on making twelve stars instead of one tree. That’s what makes them irreplaceable.
So grab your flour, preheat that oven, and create something that’ll make you smile every December for the rest of your life. No craft store trip required.